Few movie moments are as unforgettable as the Matilda Chocolate Cake Boy scene, where Bruce Bogtrotter faces an impossible challenge—devouring an enormous chocolate cake under the watchful eye of the cruel Miss Trunchbull. This legendary moment from the 1996 film Matilda is more than just a test of endurance; it has become a symbol of defiance, resilience, and ultimate triumph.
Beyond its cinematic impact, the Matilda Chocolate Cake Boy dessert itself has gained legendary status, known for its rich, fudgy texture and glossy ganache. This iconic cake has inspired countless fans to recreate it at home, bringing the magic of this beloved film into their own kitchens.
In this post, we’ll take a closer look at the history and symbolism behind the Matilda Chocolate Cake Boy scene, explore fun behind-the-scenes insights, and provide a step-by-step guide to making the perfect chocolate cake—one that even Bruce Bogtrotter would be proud of.
Get ready to relive the magic of this iconic scene while learning how to bake a truly decadent Matilda Chocolate Cake Boy-inspired dessert.
The Iconic Matilda Chocolate Cake Boy Scene – A Moment of Defiance

The Matilda Chocolate Cake Boy scene is one of the most memorable moments in children’s cinema, blending elements of humor, tension, and triumph into an unforgettable sequence. Adapted from Roald Dahl’s novel Matilda, the 1996 film brought this scene to life in a way that resonated with audiences of all ages.
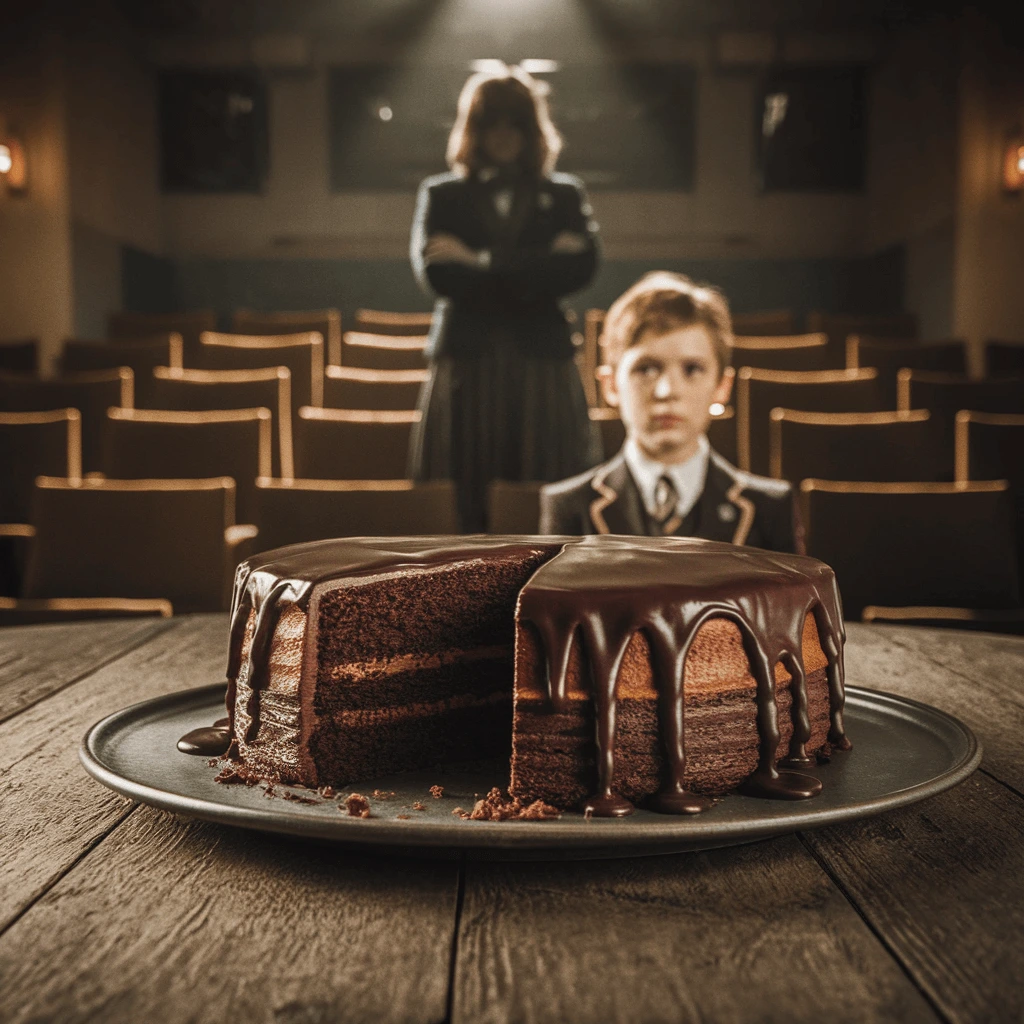
At the heart of this moment is Bruce Bogtrotter, an unsuspecting schoolboy who finds himself the target of Miss Trunchbull’s cruelty. His so-called crime? Stealing a slice of her personal chocolate cake. His punishment? Being forced to eat an entire oversized chocolate cake in front of the entire school.
What starts as a humiliating ordeal soon transforms into a symbolic act of rebellion, as Bruce refuses to be broken by Miss Trunchbull’s cruelty. Instead of surrendering, he embraces the challenge, turning it into a personal victory. This defiance, supported by his cheering classmates, marks one of the most inspiring moments in the film.
The Setup: A Test of Endurance Disguised as a Punishment
The scene unfolds in Crunchem Hall’s assembly hall, a place where students are often subjected to harsh discipline and intimidation. Miss Trunchbull, the school’s oppressive headmistress, wields absolute authority, and her punishments are often cruel and theatrical.
- The Accusation – Bruce is accused of stealing a slice of Miss Trunchbull’s cake, which she considers an offense worthy of severe punishment.
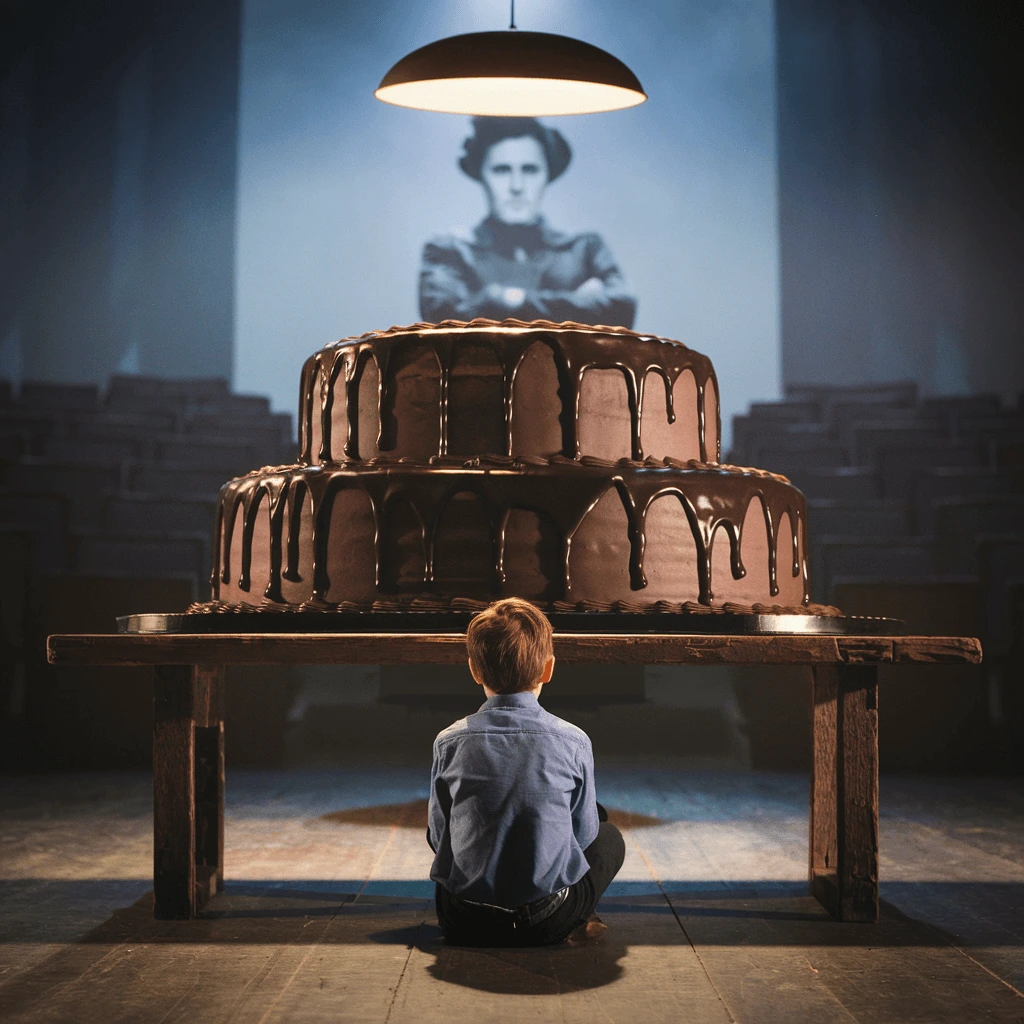
- The Challenge – Instead of a conventional punishment, she orders him to consume an entire cake—a dish that should represent indulgence but is instead turned into a tool of humiliation.
- The Overwhelming Task – The cake, a massive, rich, and dense dessert, is designed to be an impossible challenge, meant to make Bruce fail publicly.
Miss Trunchbull’s cruel intent is clear—she expects Bruce to give up, struggle, or become physically sick, reinforcing her authority in front of the students. However, Bruce’s unexpected resilience changes everything.
Bruce’s Struggle: The First Few Bites
Initially, Bruce approaches the cake with hesitation and uncertainty.
- The first few bites are slow, and it is evident that the sheer size of the cake is overwhelming.
- Miss Trunchbull’s mocking taunts and the silent, nervous energy of the students add to the pressure.
- At this moment, Bruce appears to be on the verge of defeat, and it seems like Miss Trunchbull’s punishment will succeed in breaking his spirit.
The tension is palpable, and the entire scene is structured to create suspense, making viewers question whether Bruce will be able to complete the challenge.
The Turning Point in the Matilda Chocolate Cake Boy Scene: Defiance and Strength
As the scene progresses, something unexpected happens—Bruce refuses to give in.
- Instead of succumbing to embarrassment, he embraces the challenge.
- His slow, reluctant bites turn into deliberate, determined mouthfuls.
- His classmates, initially fearful of Miss Trunchbull, begin to realize that Bruce is not backing down.
What started as a cruel test of endurance becomes a powerful act of rebellion. The students, sensing a shift in power, start cheering Bruce on, creating a wave of unity and support that changes the dynamic of the entire scene.
The Victory: A Moment of Triumph
As Bruce finishes the last bite, he lifts his plate in triumph, proving that he has overcome Miss Trunchbull’s challenge.
- The students erupt into cheers, their support symbolizing a collective resistance against their oppressive headmistress.
- Miss Trunchbull, furious that her punishment backfired, smashes the empty plate over Bruce’s head—a final act of frustration.
- Despite this, Bruce remains victorious, having turned a moment of humiliation into one of empowerment.
This pivotal moment foreshadows Miss Trunchbull’s eventual downfall, as the students begin to see her weaknesses and recognize that she can be challenged and defeated.
Why This Scene Became a Cultural Phenomenon
The Matilda Chocolate Cake Boy scene has endured as a fan-favorite moment for several reasons:
- A Classic Underdog Story – Bruce begins as a helpless victim, but by the end of the scene, he emerges as a hero, proving that even the smallest acts of defiance can lead to victory.
- Symbolism of Power and Rebellion – The scene represents standing up to bullies and oppressors, a theme that resonates with audiences of all ages.
- A Memorable Blend of Tension and Humor – The suspense of the challenge, Miss Trunchbull’s escalating frustration, and Bruce’s ultimate triumph create a moment that is both entertaining and inspiring.
- Cinematic Impact – The way the scene is filmed, paced, and acted makes it one of the most compelling moments in children’s cinema.
This scene’s legacy continues to inspire fans, spark discussions, and remain an unforgettable part of film history.
Behind-the-Scenes Facts: How the Scene Was Filmed
Filming the Matilda Chocolate Cake Boy scene was both challenging and fascinating for the actors and crew.
- The Cake Was Real – The chocolate cake used in filming was an actual homemade-style cake, making the challenge more realistic for actor Jimmy Karz.
- Multiple Takes Were Required – Since the scene needed several shots from different angles, Karz had to eat so much cake that he eventually started fake chewing to avoid feeling sick.
- The Plate-Smashing Was Staged – The shattering plate was a prop designed to break safely, ensuring that it looked dramatic without harming Karz.
These details add an extra layer of appreciation to a scene that already holds a special place in movie history.
The Lasting Impact of the Matilda Chocolate Cake Boy Scene
The Matilda Chocolate Cake Boy scene continues to inspire audiences worldwide, with fans recreating the moment in various ways:
- Baking Challenges – Many people attempt their own versions of the Matilda Chocolate Cake, trying to capture the same indulgent texture and appearance.
- Pop Culture References – The scene is frequently referenced in TV shows, articles, and online discussions, reinforcing its status as a cultural icon.
- Discussions on Power and Rebellion – The deeper meaning of the scene continues to be analyzed in literary and film studies, highlighting its significance beyond entertainment.
Final Thoughts: Why This Scene Still Resonates
The Matilda Chocolate Cake Boy scene is more than just an amusing moment in a children’s movie—it is a statement about resilience, standing up to authority, and finding strength in unexpected places.
- It reminds viewers that even the most impossible challenges can be conquered.
- It showcases the power of unity, as Bruce’s classmates come together in support.
- It proves that even the most intimidating figures can be challenged and defeated.
This legendary scene remains a timeless testament to courage, determination, and the undeniable power of chocolate cake.
Now that we’ve explored the history and meaning behind this scene, it’s time to bring the magic into your own kitchen. Up next, we’ll share a step-by-step guide to baking the ultimate Matilda Chocolate Cake, just like the one in the movie.
The Hidden Symbolism in the Matilda Chocolate Cake Boy Scene
The Matilda Chocolate Cake Boy scene is more than just a humorous and dramatic moment in the film—it is filled with symbolism that reflects power, defiance, and justice. While the audience sees Bruce Bogtrotter struggling through an enormous chocolate cake, there is a deeper meaning behind the scene that speaks to resistance, resilience, and the use of food as a tool of oppression and empowerment.
Roald Dahl, the author of Matilda, often used food as a storytelling device, and this scene is a perfect example of how something as simple as chocolate cake can represent much more than just dessert. By analyzing the hidden messages behind this legendary moment, we can see why it remains one of the most memorable scenes in children’s cinema.
Food as a Tool of Power and Control
Throughout literature and history, food has often been used as a symbol of power, control, and social status. In Matilda, Miss Trunchbull uses chocolate cake not as a treat but as a form of punishment and humiliation.
- Turning Pleasure into Punishment – Chocolate cake is typically associated with joy and indulgence, yet Miss Trunchbull repurposes it as a tool for cruelty and discipline.
- Public Humiliation – By forcing Bruce to eat the entire cake in front of his classmates, she turns food into a method of shaming and controlling others.
- Excess as a Means of Suffering – Instead of depriving Bruce of food, she forces him to consume more than is comfortable, transforming something desirable into something painful.
In this way, the Matilda Chocolate Cake Boy challenge represents more than just a disciplinary action—it is a display of power meant to remind the students that Miss Trunchbull is in control.
However, this is where the symbolism shifts, because Bruce refuses to let food be a tool of oppression.
The Chocolate Cake as a Symbol of Defiance and Strength
What begins as a punishment quickly transforms into an act of resistance.
- At first, Bruce appears overwhelmed by the task, struggling to take even a few bites.
- However, as he continues, he reclaims his power by choosing to embrace the challenge instead of submitting to it.
- His classmates, initially silent and fearful, begin to cheer him on, turning the moment into one of unity and shared rebellion.
This shift is symbolic of standing up against oppression. Miss Trunchbull’s goal was to humiliate and break Bruce, but instead, she accidentally gives him a chance to become a hero.
By finishing the cake, Bruce proves that:
- He is stronger than Trunchbull expected.
- She does not have absolute power over the students.
- A small act of defiance can spark a movement—foreshadowing the greater rebellion against Trunchbull later in the story.
Bruce’s victory turns an intended punishment into a moment of triumph, shifting the power dynamic and inspiring his classmates.
The Role of Food in Roald Dahl’s Storytelling
Roald Dahl frequently used food as a metaphor in his stories. From Charlie and the Chocolate Factory to James and the Giant Peach, food often symbolizes temptation, greed, punishment, or reward.
In Matilda, the chocolate cake scene follows a similar pattern:
- It begins as a punishment, showing how authority figures can manipulate and control others through food.
- As Bruce embraces the challenge, it shifts to an act of rebellion, proving that even something meant to be oppressive can be reclaimed and turned into a personal victory.
- The cake ultimately becomes a symbol of triumph, marking one of the first moments in the story where a student openly defies Miss Trunchbull and wins.
This use of food as a narrative device allows the scene to have both emotional depth and humor, making it one of the most effective moments in the film.
Matilda Chocolate Cake Boy: A Symbol of Justice and Retribution
Beyond power and defiance, the Matilda Chocolate Cake Boy challenge also represents justice and poetic retribution.
- Miss Trunchbull is known for being abusive and cruel toward students, creating an environment where they live in constant fear.
- However, her punishment backfires—instead of breaking Bruce, she accidentally makes him a hero.
- The cake, intended as a tool of humiliation, becomes a symbol of Bruce’s resilience and the students’ growing resistance.
This foreshadows Miss Trunchbull’s downfall, showing that her oppressive rule is not as absolute as she believes. The Matilda Chocolate Cake Boy moment is a turning point in the film, demonstrating that even small acts of rebellion can set the stage for bigger changes.
The Lasting Cultural Impact of the Scene
Even decades after the film’s release, the Matilda Chocolate Cake Boy scene remains one of the most iconic food-related moments in cinema history.
- Social Media and Pop Culture – Fans continue to recreate the Bruce Bogtrotter Cake Challenge, attempting to eat large amounts of chocolate cake as a tribute to the film.
- Baking Trends – The Matilda Chocolate Cake has become a popular recipe among home bakers and professional pastry chefs alike, inspiring countless variations.
- Academic and Literary Analysis – Scholars have examined this scene as an example of how literature and film use food to explore themes of power, control, and justice.
The symbolism behind this scene ensures that it remains relevant, making it a timeless example of how small victories can lead to larger acts of defiance.
Final Thoughts: The True Meaning Behind the Matilda Chocolate Cake Scene
The Matilda Chocolate Cake Boy scene may seem like a humorous and dramatic moment, but it carries deeper themes of power, resistance, and triumph.
- The cake starts as a weapon of humiliation, used to enforce control.
- Bruce transforms the punishment into a challenge, proving that even in the face of cruelty, strength and perseverance can lead to victory.
- The moment becomes a turning point for the students, showing that Miss Trunchbull is not invincible and that she can be challenged.
This scene remains one of the most memorable cinematic moments, reminding audiences that courage comes in many forms—even in the act of eating an enormous chocolate cake.
Now that we have explored the hidden symbolism behind this legendary scene, it’s time to bring the magic into your own kitchen. Up next, we will guide you through the step-by-step process of recreating the ultimate Matilda Chocolate Cake, just like the one in the movie.
Recreating the Matilda Chocolate Cake – Ingredients & Preparation
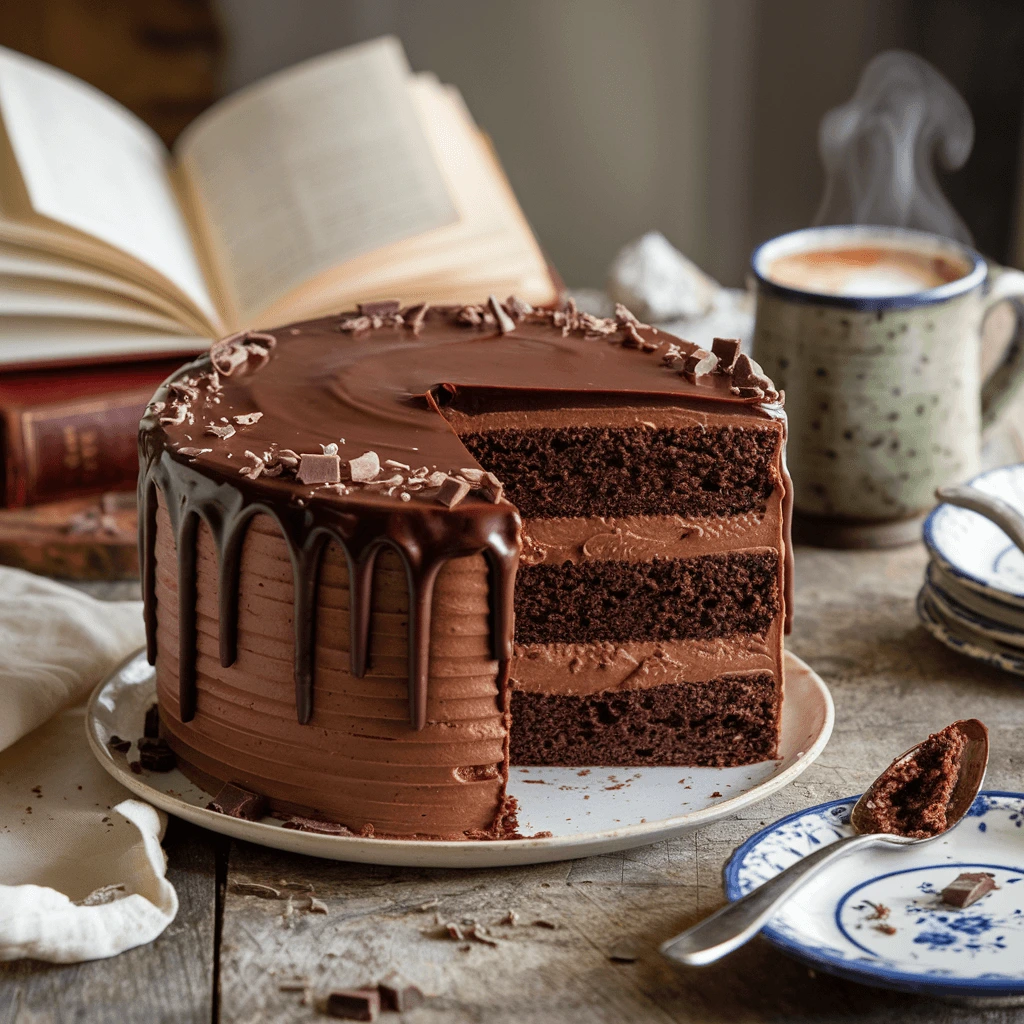
The Matilda Chocolate Cake Boy scene is legendary not only because of its impact on the story but also because of the rich, fudgy, and indulgent chocolate cake at the center of it. The cake itself is a character in the scene—dense, moist, and coated with a glossy chocolate ganache that makes it utterly irresistible.
Recreating this iconic dessert at home requires the right ingredients, precise baking techniques, and proper preparation methods to achieve the perfect Matilda-inspired chocolate cake. Whether you want to make it exactly as it appears in the film or put your own twist on it, this guide will walk you through everything you need to know.
Key Ingredients for the Ultimate Matilda Chocolate Cake
The success of this cake depends on using the right balance of ingredients to achieve the perfect texture and flavor. Here’s what you’ll need:
A. Dry Ingredients: The Base for a Rich Chocolate Flavor
- 2 cups all-purpose flour – Provides structure while keeping the cake soft.
- ¾ cup unsweetened cocoa powder (preferably Dutch-processed) – Deepens the chocolate flavor and adds richness.
- 2 cups granulated sugar – Sweetens the cake while helping retain moisture.
- 1½ teaspoons baking soda – Acts as a leavening agent to help the cake rise.
- 1 teaspoon baking powder – Ensures a light, fluffy texture.
- ½ teaspoon salt – Enhances the chocolate flavor by balancing sweetness.
B. Wet Ingredients: The Secret to a Moist and Fudgy Cake
- 2 large eggs (room temperature) – Helps bind the ingredients together.
- 1 cup buttermilk – Provides acidity that creates a tender crumb.
- ½ cup vegetable oil – Keeps the cake incredibly moist.
- 2 teaspoons vanilla extract – Enhances the chocolate flavor with a sweet, aromatic depth.
- 1 cup hot coffee or boiling water – Blooms the cocoa powder, intensifying the chocolate taste.
Pro Tip: Hot coffee brings out the bitterness and complexity of the cocoa, making the cake taste more chocolatey without adding a coffee flavor.
C. The Rich Chocolate Ganache Topping
- 8 ounces dark chocolate (at least 60% cocoa content), chopped – Creates a silky, decadent topping.
- 1 cup heavy cream – Helps melt the chocolate and form a smooth consistency.
- 2 tablespoons unsalted butter (optional) – Adds shine and extra richness.
- Pinch of salt – Enhances the deep chocolate flavor.
This two-component recipe—moist chocolate cake and glossy ganache—makes the Matilda Chocolate Cake so indulgent and memorable.
Recreating the Matilda Chocolate Cake Boy Challenge – A Step-by-Step Baking Guide
Now that you have all the ingredients ready, it’s time to prepare the cake. Follow these step-by-step instructions to achieve the best results.
1: Prepare Your Baking Tools and Oven
- Preheat your oven to 350°F (175°C) to ensure even baking.
- Grease and line a 9-inch round cake pan with parchment paper.
- If making a layered cake, prepare two cake pans and divide the batter evenly.
Pro Tip: Lining the pan with parchment paper helps prevent the cake from sticking and makes removal easier.
Step 2: Mix the Dry Ingredients
In a large mixing bowl, sift together the following ingredients:
- Flour
- Cocoa powder
- Sugar
- Baking soda
- Baking powder
- Salt
Whisk the ingredients to ensure they are evenly distributed.
Why sift the dry ingredients? This prevents lumps in the cocoa powder and flour, ensuring a smoother cake texture.
3: Combine the Wet Ingredients
In a separate medium bowl, whisk together:
- Eggs
- Buttermilk
- Vegetable oil
- Vanilla extract
Whisk until fully combined and smooth.
Why use buttermilk? The acidity in buttermilk reacts with baking soda, creating a lighter, fluffier texture while keeping the cake moist.
4: Mix the Wet and Dry Ingredients
- Gradually pour the wet ingredients into the dry ingredients, stirring gently with a whisk or a hand mixer on low speed.
- Mix until just combined—do not overmix, as this can make the cake dense.
Pro Tip: If the batter has small lumps, don’t worry—they will disappear during baking.
Step 5: Add the Hot Coffee or Boiling Water
- Slowly pour in 1 cup of hot coffee (or boiling water) while stirring continuously.
- The batter will be thin and runny—this is normal.
Why use hot liquid? The heat activates the cocoa powder, intensifying the chocolate flavor and making the cake more fudgy and moist.
6: Bake the Cake
- Pour the batter into the prepared cake pan(s).
- Place in the preheated oven and bake for 30-35 minutes, or until a toothpick inserted in the center comes out with a few moist crumbs (not wet batter).
Avoid overbaking! If the toothpick comes out completely dry, the cake may have lost some of its moisture.
7: Cooling the Cake
- Let the cake cool in the pan for 10 minutes, then transfer it to a wire rack to cool completely.
- Do not add the ganache while the cake is warm, as it will melt unevenly.
Want an extra rich texture? Wrap the cooled cake in plastic wrap and refrigerate for a few hours before frosting.
8: Prepare the Chocolate Ganache
- Heat the Cream
- In a small saucepan, heat 1 cup of heavy cream until it just begins to simmer.
- Do not let it boil.
- Melt the Chocolate
- Place chopped dark chocolate in a heatproof bowl.
- Pour the hot cream over the chocolate and let it sit for 1-2 minutes to soften.
- Whisk Until Smooth
- Stir gently until the chocolate is completely melted and the ganache is smooth and glossy.
- Add butter and a pinch of salt for extra richness.
Want a thicker ganache? Let it cool for 20-30 minutes before using.
9: Assemble and Frost the Cake
- Place the cooled cake on a serving plate.
- Pour the warm ganache over the cake, letting it drip naturally over the sides.
- Use an offset spatula to spread the ganache evenly for a smooth finish.
For an extra professional look, top with chocolate shavings or a dusting of cocoa powder.
Final Thoughts: The Ultimate Chocolate Cake Experience
With its moist crumb, deep chocolate flavor, and silky ganache, this homemade Matilda Chocolate Cake is a tribute to Bruce Bogtrotter’s legendary cake challenge. Whether you’re making it for a Matilda-themed party, a special celebration, or just to indulge, this cake is guaranteed to be a showstopper.
Now that the cake is ready, let’s explore fun serving ideas, storage tips, and variations to make it even more irresistible.
Step-by-Step Guide to Baking the Perfect Matilda Chocolate Cake
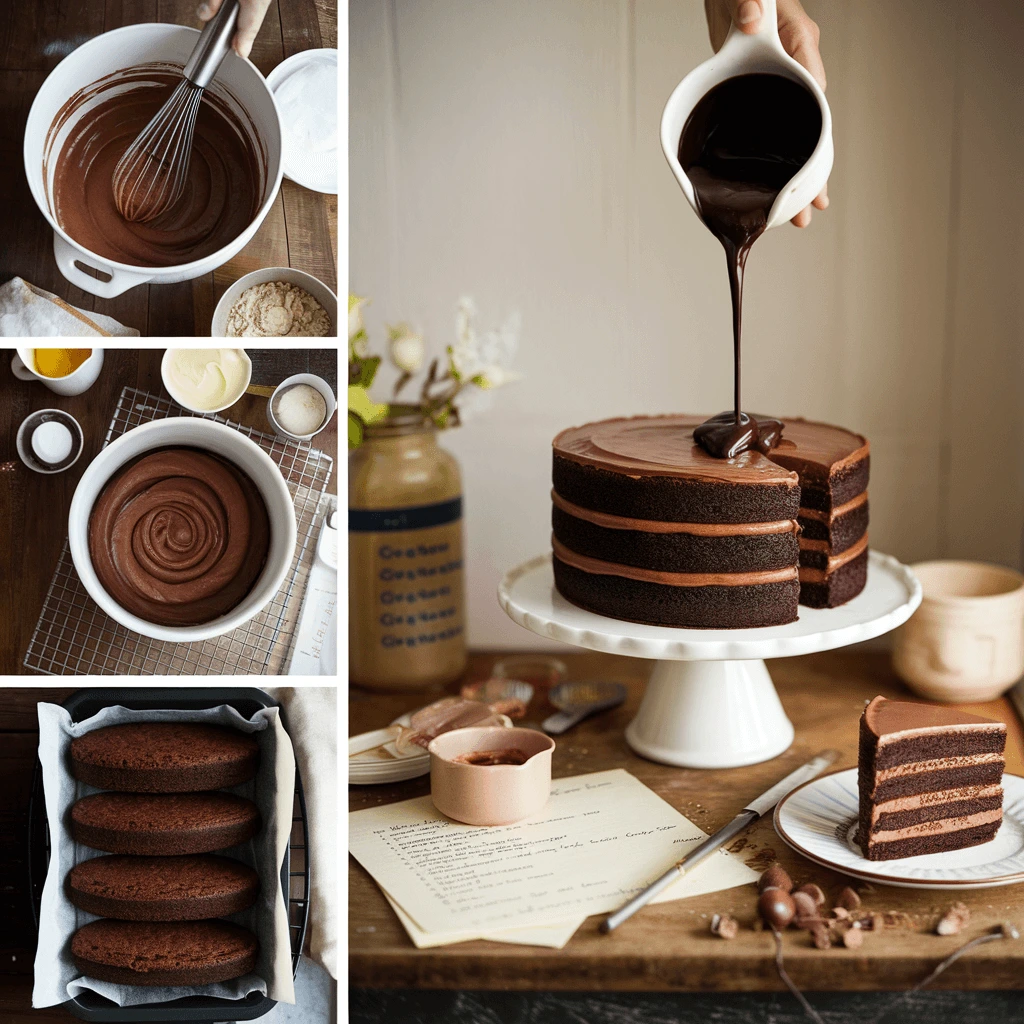
Baking the perfect Matilda Chocolate Cake requires a combination of high-quality ingredients, precise techniques, and proper timing. This guide will take you through each step, ensuring that your cake is as rich, fudgy, and indulgent as the one from the iconic Matilda Chocolate Cake Boy scene.
Whether you’re baking it for a themed party, a nostalgic movie night, or simply to satisfy a chocolate craving, this guide will help you create a cake that’s moist, delicious, and worthy of celebration.
Step 1: Gather Your Baking Tools and Preheat the Oven
Before you begin, ensure you have the right baking tools and setup to create a smooth baking experience.
Tools You’ll Need:
- 9-inch round cake pans (one for a single-layer cake, two for a layered cake)
- Parchment paper (to line the pans and prevent sticking)
- Mixing bowls (one for dry ingredients, one for wet ingredients)
- Whisk and rubber spatula (for mixing)
- Hand mixer or stand mixer (optional, but helps with smooth mixing)
- Measuring cups and spoons
- Cake tester or toothpick (to check doneness)
- Wire cooling rack (for even cooling)
Preheating the Oven
- Set the oven to 350°F (175°C). A preheated oven ensures even baking.
- Grease and line the cake pans with parchment paper. This prevents the cake from sticking and ensures easy removal.
Pro Tip: If you’re using two cake pans, divide the batter evenly between them for a layered cake.
2: Mix the Dry Ingredients
In a large mixing bowl, sift together the following:
2 cups all-purpose flour (for structure)
¾ cup unsweetened cocoa powder (preferably Dutch-processed) (for deep chocolate flavor)
2 cups granulated sugar (for sweetness and moisture)
1½ teaspoons baking soda (for leavening and light texture)
1 teaspoon baking powder (for extra rise)
½ teaspoon salt (to enhance the chocolate taste)
Why Sifting is Important:
- Removes lumps in cocoa powder and flour.
- Helps distribute the leavening agents evenly.
- Ensures a smooth, lump-free cake texture.
After sifting, whisk the dry ingredients together to combine.
3: Combine the Wet Ingredients
In a separate medium bowl, whisk together:
2 large eggs (room temperature) – Helps bind the ingredients and add structure.
1 cup buttermilk – Adds moisture and keeps the cake tender.
½ cup vegetable oil – Ensures a soft, moist crumb.
2 teaspoons vanilla extract – Enhances the chocolate depth.
Mix until fully combined and smooth.
Why Buttermilk? The acidity in buttermilk reacts with the baking soda, creating a light and fluffy texture while keeping the cake moist. If you don’t have buttermilk, you can substitute 1 cup of milk mixed with 1 tablespoon of lemon juice or vinegar and let it sit for 5 minutes.
4: Add the Wet Ingredients to the Dry Ingredients
- Gradually pour the wet mixture into the dry ingredients, stirring gently.
- Mix until just combined—do not overmix, as this can create a dense, tough cake instead of a light and fudgy one.
Pro Tip: If there are small lumps in the batter, don’t worry—they will disappear during baking. Overmixing leads to gluten development, which can make the cake chewy instead of soft.
5: Add Boiling Water or Hot Coffee
- Slowly pour in 1 cup of boiling water or hot brewed coffee, stirring continuously.
- The batter will be thin and runny—this is normal.
Why Use Hot Liquid?
- The heat activates the cocoa powder, intensifying the chocolate flavor.
- Hot coffee enhances the depth of chocolate without adding a coffee taste.
- The liquid ensures the cake remains moist and fudgy after baking.
Once mixed, the batter should be smooth and pourable.
6: Pour and Bake the Cake
- Pour the batter evenly into the prepared cake pan(s).
- Place in the preheated oven and bake for 30-35 minutes.
- Check for doneness by inserting a toothpick into the center—it should come out with a few moist crumbs, but not wet batter.
Avoid Overbaking:
- If the toothpick comes out completely dry, the cake is overbaked and may be dry.
- Start checking at 30 minutes and bake longer only if needed.
Pro Tip: If the top browns too quickly while the center is undercooked, tent the cake loosely with aluminum foil to prevent over-browning.
7: Cooling the Cake Properly
- Let the cake cool in the pan for 10 minutes, then transfer it to a wire rack.
- Allow the cake to cool completely before adding the ganache, or the chocolate topping will melt unevenly.
Want an Extra Rich Texture? Wrap the cooled cake in plastic wrap and refrigerate for a few hours before frosting. This helps the flavors develop fully and makes slicing cleaner.
Step 8: Making the Chocolate Ganache
The silky chocolate ganache is what gives this cake its signature glossy finish and rich chocolate taste.
Ingredients for Ganache:
8 oz dark chocolate (at least 60% cocoa content), chopped
1 cup heavy cream
2 tablespoons butter (optional, for shine and richness)
Pinch of salt
How to Make It:
- Heat the Cream
- In a small saucepan, heat the heavy cream until it just begins to simmer. Do not let it boil.
- Melt the Chocolate
- Place the chopped chocolate in a heatproof bowl.
- Pour the hot cream over the chocolate and let it sit for 1-2 minutes.
- Whisk Until Smooth
- Stir gently until the chocolate melts completely, forming a silky, glossy ganache.
- Stir in butter and salt for extra richness.
For a Thicker Ganache: Let it cool for 20-30 minutes before pouring it over the cake.
Step 9: Frost and Assemble the Cake
- Place the cooled cake on a serving plate or cake stand.
- Pour the warm ganache over the cake, letting it drip naturally over the sides.
- Use an offset spatula to smooth the ganache for a polished look.
Optional Toppings:
- Chocolate curls or shavings for a gourmet touch.
- A dusting of cocoa powder for an elegant finish.
- Fresh raspberries or strawberries for a fruity contrast.
For a Layered Cake: Spread a layer of ganache between two cake layers before covering the entire cake.
Final Thoughts: The Ultimate Matilda Chocolate Cake Experience
By following this step-by-step guide, you can create a Matilda-inspired chocolate cake that is as decadent and indulgent as the one in the film. Whether you are recreating the famous Bruce Bogtrotter moment or simply enjoying a rich, fudgy chocolate dessert, this cake is sure to impress.
Now that your cake is ready, let’s move on to the best ways to serve, store, and customize it for any occasion.
Fun Variations & How to Store Your Cake
The Matilda Chocolate Cake is already a showstopper with its moist, rich chocolate layers and silky ganache, but that doesn’t mean you can’t have fun customizing it to fit your preferences. Whether you want to add a unique flavor, cater to dietary restrictions, or put a fun twist on the classic recipe, there are endless ways to make this cake your own.
Additionally, if you want to enjoy your cake for days or prepare it in advance for a special occasion, proper storage methods are essential to maintaining its freshness and texture.
Fun Variations of the Matilda Chocolate Cake
Whether you want to enhance the chocolate flavor, add a new texture, or create a healthier alternative, these variations will give your Matilda Chocolate Cake a unique twist while still keeping it indulgent and delicious.
1. Double Chocolate Overload
For true chocolate lovers, this variation takes the richness up a notch.
- Add ½ cup of dark chocolate chips to the batter for extra melty pockets of chocolate.
- Replace boiling water with hot chocolate milk for an ultra-decadent touch.
- Use milk chocolate ganache instead of dark chocolate for a sweeter flavor.
- Sprinkle grated chocolate or cocoa nibs on top for extra texture.
2. Salted Caramel Chocolate Cake
Adding salted caramel creates a perfect balance between sweet and salty flavors.
- Drizzle homemade or store-bought salted caramel sauce between layers before adding ganache.
- Sprinkle flaky sea salt on top of the ganache for a gourmet touch.
- Add a thin layer of caramel buttercream frosting between cake layers.
3. Peanut Butter Chocolate Cake
Chocolate and peanut butter are a match made in heaven.
- Swirl ½ cup of creamy peanut butter into the batter before baking for a nutty twist.
- Spread peanut butter frosting between the cake layers.
- Top with crushed peanuts or Reese’s peanut butter cups for added crunch.
4. Raspberry-Filled Chocolate Cake
A fruity contrast can brighten the deep chocolate flavors and add freshness.
- Spread raspberry jam between the layers before adding ganache.
- Add a handful of fresh raspberries on top of the cake for decoration.
- Pair with a white chocolate drizzle for an elegant touch.
5. Mocha Chocolate Cake
For those who love coffee and chocolate, this variation enhances the chocolate’s depth.
- Replace boiling water with strong brewed espresso in the batter.
- Add 1 teaspoon of espresso powder to intensify the chocolate flavor.
- Dust the top with a blend of cocoa powder and espresso powder for a café-style finish.
6. Gluten-Free Matilda Chocolate Cake
For those with gluten sensitivities, this version keeps all the flavor without the wheat.
- Replace all-purpose flour with a gluten-free 1:1 baking flour blend.
- Add 1 tablespoon of cornstarch to maintain structure.
- Ensure that all ingredients, including cocoa powder and baking powder, are gluten-free.
7. Vegan Matilda Chocolate Cake
If you want a dairy-free and egg-free option, these swaps work perfectly.
- Replace eggs with flaxseed eggs (1 tablespoon ground flaxseed + 3 tablespoons water per egg).
- Use coconut milk or almond milk instead of buttermilk.
- Swap butter for coconut oil or vegetable oil and use dairy-free chocolate for the ganache.
How to Store Your Matilda Chocolate Cake for Maximum Freshness
Proper storage ensures your cake remains moist, flavorful, and fresh for as long as possible. Whether you’re saving leftovers or making it ahead of time, follow these methods for the best results.
1. Storing at Room Temperature (Up to 2 Days)
If you plan to eat the cake within 48 hours, you can store it at room temperature.
- Place the cake in an airtight cake container or cover it with plastic wrap to prevent drying.
- Keep it in a cool, dry place away from direct sunlight and heat.
- If the cake is sliced, press a piece of parchment paper against the exposed edges to keep it from drying out.
💡 Ganache Cakes Tip: If the weather is hot or humid, storing the cake at room temperature may cause the ganache to melt slightly. In this case, refrigerate it instead.
2. Refrigerating the Cake (Up to 1 Week)
For longer storage, refrigeration helps preserve the freshness of the cake while keeping the ganache intact.
- Wrap the cake tightly in plastic wrap or place it in an airtight container.
- Store it on a middle shelf in the refrigerator to avoid temperature fluctuations.
- Before serving, let the cake sit at room temperature for 15-30 minutes to soften.
💡 Reviving Refrigerated Cake: If the ganache hardens, microwave individual slices for 10-15 seconds to bring back the fudgy texture.
3. Freezing the Cake (Up to 3 Months)
Freezing is the best way to store the cake long-term while maintaining its quality.
How to Freeze a Whole Cake:
- Let the cake cool completely before freezing.
- Wrap the cake tightly in plastic wrap, then a layer of aluminum foil to prevent freezer burn.
- Store it in the freezer for up to 3 months.
How to Freeze Individual Slices:
- Slice the cake into single-serving portions.
- Wrap each slice tightly in plastic wrap and place them in an airtight freezer bag.
- To thaw, transfer slices to the refrigerator overnight or microwave for 15-20 seconds.
💡 Best Freezing Method: If freezing a frosted cake, flash-freeze it uncovered for 1 hour, then wrap it in plastic to prevent the ganache from sticking.
Final Thoughts: Customizing and Preserving the Matilda Chocolate Cake
The Matilda Chocolate Cake is already an indulgent masterpiece, but with creative variations and proper storage techniques, you can make it even more special.
- Whether you want to try a salted caramel version, a mocha twist, or a gluten-free alternative, there are countless ways to make this cake your own.
- By following the right storage methods, you can enjoy your cake fresh for days or even months after baking.
Now that you know how to customize and preserve your Matilda Chocolate Cake, it’s time to slice in and enjoy every fudgy, chocolatey bite.
Conclusion: The Legacy of Matilda’s Chocolate Cake Boy Scene
The Matilda Chocolate Cake Boy scene is more than just a famous moment from a beloved film—it’s a powerful symbol of resilience, defiance, and triumph over injustice. What begins as a cruel punishment transforms into an inspiring act of courage, proving that even in the most challenging situations, determination and support from others can lead to victory.
Beyond its deeper meaning, the Matilda Chocolate Cake itself has become an iconic dessert, known for its rich, fudgy texture and glossy ganache. The cake, much like the scene it originates from, represents indulgence, nostalgia, and a love for chocolate that transcends generations.
Why This Scene Remains Unforgettable
Even decades after the release of Matilda, the chocolate cake challenge continues to be one of the most memorable moments in film history. There are several reasons why this scene continues to resonate with audiences:
- A Classic Underdog Story – Bruce Bogtrotter’s unexpected triumph reminds us that small victories matter and that standing up to oppression is always worth it.
- A Universal Message – The scene’s themes of defiance against authority, unity, and resilience remain relevant across generations.
- A Perfect Blend of Drama and Humor – The tension, the humor, and the ultimate victory make it a perfectly executed cinematic moment.
- Cultural Impact – The scene has inspired everything from social media cake challenges to academic discussions on food symbolism in film.
The Matilda Chocolate Cake Boy challenge is a testament to the power of storytelling, where food is more than just something we eat—it carries meaning, emotions, and messages about power and control.
Bringing the Magic into Your Kitchen
Recreating the Matilda Chocolate Cake at home is not just about baking—it’s about reliving the nostalgia of the film, celebrating its message, and indulging in an unforgettable chocolate experience. Whether you follow the classic recipe or put your own spin on it with fun variations, this cake is guaranteed to be a crowd-pleaser.
By following our step-by-step baking guide, you now have the tools to create a fudgy, rich, and decadent chocolate cake that Bruce Bogtrotter himself would be proud of. From selecting the best ingredients to perfecting the ganache, this cake is designed to be the ultimate chocolate lover’s dream.
How You Can Join the Conversation
If you’ve tried making the Matilda Chocolate Cake, we’d love to hear about your experience!
- Did you stick to the classic recipe, or did you try one of the fun variations?
- Did this cake bring back childhood memories of watching Matilda?
- Do you think you could take on the Bruce Bogtrotter Challenge and finish the whole cake?
Share your thoughts in the comments below and let us know how your Matilda-inspired chocolate cake turned out. If you loved this recipe, don’t forget to share it with friends and family who would enjoy recreating this legendary dessert!
Final Thoughts: The Sweetest Victory
The Matilda Chocolate Cake Boy scene is a reminder that sometimes, the smallest acts of resistance can make the biggest impact. Bruce’s story teaches us that even when faced with intimidation and unfair treatment, perseverance and courage can lead to victory.
And what better way to celebrate this message than by baking and enjoying a slice of rich, fudgy chocolate cake? Whether you make it for a birthday, a themed party, or simply for the love of chocolate, this cake is more than just a dessert—it’s an experience, a piece of nostalgia, and a symbol of standing up for yourself.
Now, it’s time to grab a fork, take a bite, and savor the victory.
2 thoughts on “Matilda Chocolate Cake Boy: Iconic Scene & Recipe”